Well, here we are with part two: cutting out your cushion and sewing it all together!
Unfortunately, I don’t have any pictures of the cutting out part, so you won’t get to see my mad cutting skills. :) but I will do my best to explain without pictures.
Oh, and in case you missed Part 1 of this mini-series, which was how to make the cording, you can read it here.
Cutting out your cushion:
- Cut cushion front and back whatever size you want, plus the depth measurement plus 1”. The depth measurement is necessary if you are making a box pillow/cushion, which I did.
- Fold front piece into fourths with corners together. Mark a point halfway between the corner and the fold on each open side. So you should have two points you mark. At the open corner, mark a third point that is 1/2” from each edge.
- Trim fabric from the point on the side to the point on the corner. Repeat on the other open side.
- Unfold the front and use it to trim the back piece in the same way. This step eliminates “dog-ears” on your cushion. Yes, I always wondered how to keep them from doing that too.
Now that we have our pieces cut out, we are ready to start putting it all together:
1. Pin cording to right side of cushion top with the cording facing in. (Oh what a difference those little words make!) Sew together.

2. When you are about 2 inches away from the point where the cords will meet, stop stitching and leave needle in fabric. Cut off excess cord, leaving enough for it to overlap by 1”
3. Take out 1” of stitching from each end of the cording. Trim ends of the cord only, not the casing, so that the cords just meet.
4. Fold under the end of the casing that is on top to hide raw edges. Lay it over the other end and finish stitching.

5. Lay back piece on front, right sides together. Sew together. Leave part of the seam open that will be on the back of the cushion.


6. I chose to make mitered corners on my cushion, but there are other options available. To do this, follow these steps:
- Cut the excess material off at the corners.

- Separate front and back at corners. Line seams up and pin at seams.
- Make a line half the thickness of your finished cushion away from the corner. For instance, my cushions were to be 2” thick, so I make a line 1” from the corner
- Sew across this line.

- OH MY GOODNESS THAT IS SO EASY AND IT LOOKS SO PROFESSIONAL!!!!

7. Stuff your cushion. Oh what funness!!! You can use a foam chair form thingy available at Walmart or any craft store. Or just stuff it with regular pillow stuffing. If you are making a cushion, you will want to stuff it very full to that it will be nice and firm.
8. Now it is time to make the ties. You can make these as big or as small as you prefer, but make sure you make them long enough to be able to tie them to the chair securely. For mine I cut a piece of fabric 2 1/2”x14”. You must make 4 of these per cushion.
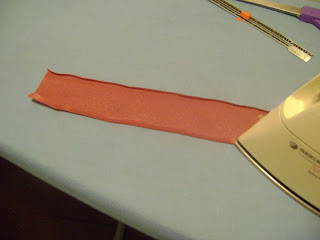
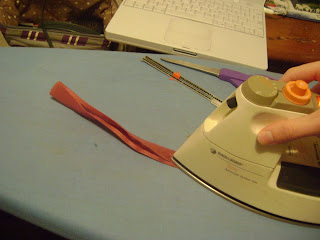
9. Press under 1/8” on long edges. Press in half lengthwise, wrong sides together.
10. Edgestitch on open edge. Leave ends open. Tie a single not at one end of each tie, enclosing raw edges. My material was very sheer, so I put a drop of Fray Check on the end as well.


11. Pin these ties into opening on the back of the cushion. Pin two ties next to each other on each side.

12. Make sure your pillow is stuffed completely before going on!!!!! Or else you will have to rip out your seam to fix it. Take my word for it.
13. Sew opening closed, making sure to secure ties well. Yes, it is a bit awkward, especially with a small work space. So just make it work.

Yes, I know my pins are all going the wrong direction. You...uh...dont’ prick yourself as easy that way. Seriously!
And now, my friends (my very dedicated friends, if you are still reading this thing) You are done your very cute, easy cushion. Unless, of course, you want to finish it off with cute, easy buttons...which will be the last part of this tutorial...which I will post soon. :)

Note: when using this comfy swivel chair to quickly move from sewing machine to iron to bed workspace back to sewing machine, do not, I repeat do not knock over ironing board with said comfy swivel chair. Don’t say I didn’t warn you.


No comments:
Post a Comment
I appreciate you taking the time to comment! Some comments may need to be moderated, so don't be alarmed if your comment doesn't pop up right away. I can't wait to hear from you!