


It was actually a shower curtain, the nice heavy fabric kind. We were looking for panels to put in a new washroom at church, and this was just screaming out at me! The walls are blue, so I wasn't looking for more blue in the space, but I just couldn't pass up this huge, good-quality fabric for less than $5. So, we brought it home.
We already had a sheer curtain hanging in the window for privacy, but wanted some color in the space to frame out the window. The two panels will never be drawn together, so I didn't have to worry about how full these were. I just cut this big piece in half to create the two panels.
I pinned the curtain in half to keep things from sliding around:

And then just ran my scissors up the fold to cut in in half. This is easy to do with a sharp pair of scissors!

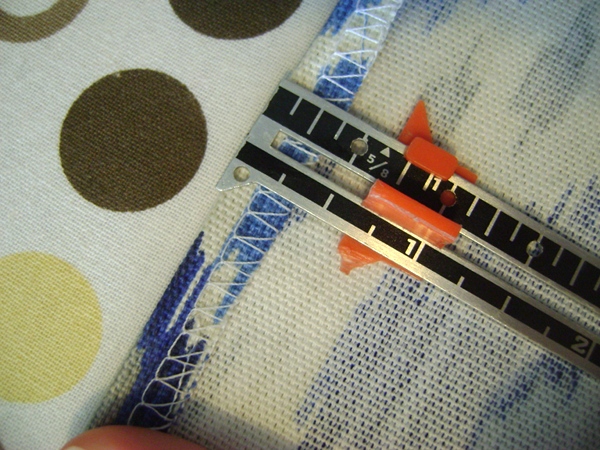
The exciting thing about using an already existing curtain is that half the hemming is done for me. :) I just had to hem the one side that I cut. I do that by serging the edges, then pressing a 5/8" hem, and sewing!
 |
| Pardon the fact that it looks like I'm cramming tons of fabric under the foot...I really wasn't! |

If you don't have a serger, a hem is still pretty easy to do. Just fold over a small hem and press {about 1/4 to 1/2 inch} and then fold over another 5/8" and press again. Then sew!
 |
| See? Now the raw edge is exposed. |
Here are the settings on my sewing machine when I do hems. My stitch length is an 8 on my machine. Since the hem isn't going to take any kind of pressure {not like seams on clothing or anything} the stitches don't need to be too small.

Final step in this easy DIY: making the rod casing and heading!

This is totally a step that depends on your own preference, the size/height of the room, and the size of the rod. I did a 3" heading because the window is quite big, and a 1 1/2" rod casing because that is a comfortable width for a normal rod. High-tech, thats me.

The after pictures were hard to capture because of the widow glare, but the finished product is GORGEOUS in person!


They are lovely, nonetheless. :) It was an easy project, which is always way more fun with such pretty fabric!
Have you made curtains recently? You know I'm a huge fan...and these are some of the easiest panels to make. What are you DIYing these days?
Linking up with: Pin Me Party, Show and Tell, Friday Frugal Finds, Spotlight Saturday, Threading Your Way, From Dream to Reality

oh my word..I love the color of that fabric!
ReplyDeleteMe too! Obviously. :) I'd love to pull some of the gray out with other elements in the room.
DeleteI have that same sewing machine! Even though it is currently in storage and I am using a newer one, I still love that machine!
ReplyDeleteOh wow, too funny! I LOVE this machine, even though it has limited options. I have a newer one for more stitching options, but this one is my fav. Thanks for commenting!
DeleteWhat a great job you did! They look beautiful! Thanks so much for stopping by and leaving such a sweet comment on my Dollar Tree post!!
ReplyDeleteHugs,
Deb
Thanks Debbie! =)
Deleteloved that you repurposed your thrift store find! the colors go perfect too.
ReplyDeletethanks for linking up!
Thank YOU for endlessly sharing your great thrifting finds! =)
DeleteA great set of curtains for the washroom. They look great and should be very sturdy.
ReplyDeleteThanks so much, Pam! And thanks for the fun parties! :)
DeleteLOVE IT!! What a great idea!
ReplyDeleteThanks so much for sharing this at The DIY Dreamer... From Dream To Reality last week! Looking forward to partying with you again tomorrow evening!
Thank you Christine! And thanks for the fun party! =)
Delete