New here? I'm glad you are visiting! You may want to follow this blog so you don't miss miss a post!


In the last few days of this series, I want to share a few important tutorials with you. Today you are going to learn how to install a zipper!
I'm showing you how to install a zipper between two pieces of fabric. For this, you will need a zipper foot for your machine. Mine looks like this {next to the regular foot}:
My zipper foot can be used to the right or the left, but I always use it so the zipper runs to the left of the foot. I've heard of people that are able to install a zipper with a regular foot, but I don't know how they do it! I need my zipper foot!
To start, lay your zippers wrong side on your inner fabric's right side. The zipper needs to be open.
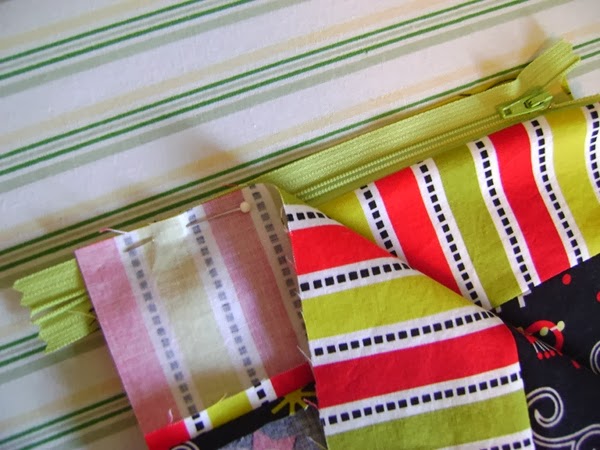
Then lay your top fabric's right side on top. So the zipper right side and fabric right side are together. {If you are only sewing your zipper into one fabric, not two, start with this step.}
Pin this in place.
Sew down this edge, with the zipper teeth to the left of the foot.
When you get near the end of the seam, you will need to stop and pull the zipper closed. This gets the zipper pull out of the way of the presser foot. See how the end of the zipper at the bottom of this frame is not sewn in yet?
Once you close the zipper, go back and finish the seam.
And one side is complete!
You probably want to iron this before going any further. Or maybe that's just me, because I'm the queen of ironing things. =)
You're half done! Now on to the other side. You line things up exactly the same way as before, except for this time the zipper needs to be closed to start out.
Just so you don't have to scroll back up: right side of inner fabric to wrong side of zipper...
Then right sides of top fabric and zipper together. Pin in place.
Sew down this side, making sure to stop and open the zipper before you get to the end...
And it is done! Make sure you iron the other side to keep everything laying flat.
The backside...
Pat yourself on the back. See how easy that was?
Psst! In case you didn't already figure it out, this is yet another sneak peek at the Christmas collection from So Sew Organized! I'm super excited to be revealing this to you in the next week, so stay tuned! Follow us on Facebook or subscribe to the newsletter {in the right sidebar} to be sure you are the first to know about it!
Challenge: Have you ever sewn in a zipper before? What is stopping you? Give it a try, and soon! Be sure your machine has a zipper foot, or purchase one if necessary. I'd love to hear if you are one that can do it with a regular foot...how do you do it?
Other posts in this series:
Day 4: Purchasing Notions
Day 5: Helpful Links for beginners
Day 6: Free Art Download (on Discipline)
Day 7: Purchasing Fabric
Day 8: Fabric Prep
Day 9: Studio tour and work spaces
Day 10: Making a straight seam
Day 11: Seam ripping
Day 12: Online fabric stores
Day 13: Free Art Download {on Beauty}
Day 14: Buying a pattern
Day 15: Using a pattern
Day 16: Who needs a pattern?
Day 17: On Having Patience
Day 18: Turning things Right Side Out
Day 19: Helpful links
Day 20: Free Download {a colourful print}
Day 21: My Serger
Day 22: A Simple Hem
Day 23: A French Seam
Day 24: A Blind Hem
Day 25: Euro Hem
Day 26: Links from inspiring seamstresses
Day 27: Free Art Download {on adversity}
Linked up with: From Dream to Reality


No comments:
Post a Comment
I appreciate you taking the time to comment! Some comments may need to be moderated, so don't be alarmed if your comment doesn't pop up right away. I can't wait to hear from you!