Showing posts with label Photography. Show all posts

Thursday, June 13, 2013

Oregon Beauty and Fun

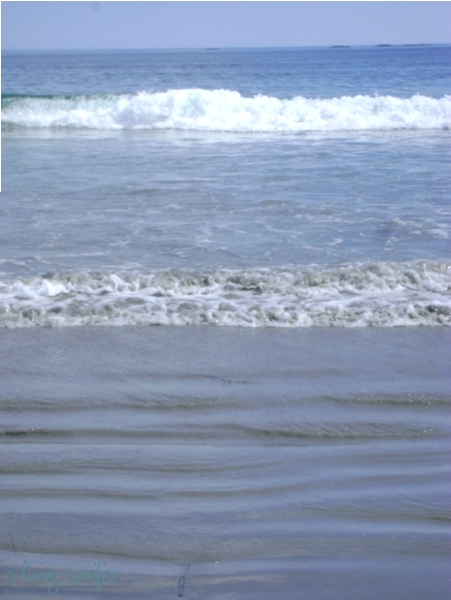
During the last few weeks, I spent a few days in Maine and about 12 days in beautiful Oregon. I had never been to Oregon before, so it was fun to see new places and experience some new things! I snagged tons of pictures - over 200, actually - while I was away, but just wanted to share some to bring the beauty to your computer screen.

A few of these were from Maine, but most were from Oregon...and pictures just don't do it justice! Enjoy! :)

I just love old headstones, even though they are a little sad! This one says,
Eliza Elvira
Dau. of
Charles & Louisa L.
OSBORNE
DIED
12 Month 30 d 1877
Aged 26 years


I have more goodies from my trip for you tomorrow! Stay tuned! =) In the meantime, have you snagged your Natural Homemaking eBook bundle yet? Hurry, only a few more days before this offer will be gone forever!


Friday, February 8, 2013

A {Cold} Birthday Photoshoot!

Every year, the kids get new photos taken for their birthday. It is so fun to go back and see how they have grown year after year! This year we did two things similar to last years photos...

1. I took them myself
2. We procrastinated waited until long after their birthdays were past to get it done.{wink}

It ended up being a sunny, fresh-snow-on-the-ground, but freezing cold day...which made for some beautiful backdrops! I did both Rachel's and Carries all in one quick half hour, so we didn't have to stay out in the cold for too long. And as I've said before, I'm no professional, but I do enjoy taking their pictures and experimenting with it a little bit!

Rachel turned 13 last November. Here are last year's pictures so you can compare with these!

See that frozen whiteness behind her? That is a waterfall near our house. Yup, it was frozen over! So pretty!
You can still see the effects of the pox on her face :(


Carrie turned 9 last October. Last year's pictures were taken indoors, and she really wanted to have hers done outside this year!

I really kicked myself once we got inside, unfogged my glasses, and I took a good look at these. The focus is not exactly right...nor the composition. The snow was glaring so bad I could hardly see the screen on my camera, so I definitely would have centered her a bit more and done better had I known. So there is my disclaimer for these less-than-stellar shots. =)


My favourite one of her!

They wanted some fun ones together, too!

She had been talking all morning about how she wanted to take this funny shot!


After taking these and lots more at the waterfall, I moved to the abandoned house behind ours and used the old barn doors as a backdrop. I thought it would tie in great with Rachel's "western" theme she had going on. These turned out to be my favourites!!


It was a fun {cold} half an hour with two funny girls!

Anyone else doing any unprofessional winter photo shoots?


Thursday, November 8, 2012

Blog Picture Edits

Yesterday, I chatted about my self-proclaimed rules for taking pictures for this ol' blog. Today, I'm going to show you the minor edits I do to them so they look their best when they reach your computer monitor.

For all my picture and design stuff I use Gimp, a free download-able program that can do anything. Ok, I don't actually know that it can do anything...but it can do so much that I don't understand that it seems like everything. I'm waiting for it to perk me coffee. Pretty sure its possible.

Anyway, I showed you once how I make blog buttons in Gimp. I also do my photo editing with this program. I'm going to use some pictures from this stop in our Nova Scotia tour to demonstrate the edits.

First step is to open up your desired picture in Gimp. Then, under the “Image” tab at the top, click on “scale image.”


This window will pop up:


I make my blog pictures 600x450 pixels. That is a good size for my blog, but you can adjust it to whatever size you would like.

I never use to size my pictures, (just uploaded them straight from the camera) until I unknowingly filled my free space in Picasa, where all the pictures from my blog were secretly being stored. In the panic that ensued, someone told me that if your pictures are under a certain size, it doesn’t count toward your free space. I’m not sure what size they have to be, but I do know I haven’t had a problem since. Phew!

Here is our pictures after scaling, with no editing:


 Next, under the “Colors” tab, go to “Brightness-Contrast.”


This window will pop up:


I set both levels at 10, which makes for a great picture-pick-me-up 99% of the time. The other 1% is when I have an extremely dark or bright shot...then I play around with the levels until it looks better. But as a general rule, 10 and 10 is a good number.

Now, the picture looks like this:


 I do just one more edit to make the image top-notch (or at least as top-notch as its gonna get). Go back to the “Color” tab and click on “curves.”


Here is the default setting:


And here is the minuscule amount that I tweak it. I just grab that line in the center and drag it up slightly.


I can’t explain how that makes a different, but it does make the image just a tad sharper.


The last thing that I sometimes do is watermark my photos with my blog name. I generally only do this if a) I have time, or b) it is a picture that might get snagged for Pinterest or anything else. I don’t mind sharing my picts on the www, but I’d like a little credit or at least traffic from it, thankyouverymuch.

Here are the settings I use for the text. This is all found on the toolbox menu in Gimp.


I played around with the font and stuff quite a bit (even changed the color on every photo so it would blend in more) but this setting seems to work well and be subtle enough for every photo. You could go with just black or grey if you wanted to be even more neutral, but who doesn’t like a pop of turquoise?


Here is the "before" one more time, so you can see the difference up close and personal:


It is not a huge difference (especially since everything in the picture is reading very bluish) but it is a bit brighter and sharper, which can make it much more eye-appealing.

Here are a couple more befores and afters so you can see the difference:

Before

After

Before

After

Before

After

This may seem like a complicated regime of stuff on each picture, but I have it down to a science with the push of a few buttons. I normally edit blog pictures while pushing the Super Lucky Button. :)

Now lets chat picture editing. Do you do any to your blog picts before hitting the publish button? What do you think is a good size/format for blog pictures? As a reader, what do you like to see in blog pictures when you visit a site?


Wednesday, November 7, 2012

Blog Photography

When I first started blogging, I knew nothing about taking pictures. Nothing. Actually, I knew nothing about blogging, either, but that is another post for another day.

Case in point...this horrible old photo that, unfortunately graces this blog from back in the early days…


While I still sometimes have less than desirable pictures, I’ve come quite a ways since those old posts of yore, and can thankfully turn out better pictures most of the time. Here are a few that I’m particularly proud of:


Today I'd like to share some tips I've learned about taking photos for the blog - photos that look appealing but aren't like photo studio quality, ya know? They still aren’t as nice as I’d like - partially because we only have an el-cheapo point and shoot camera, and also because its several years old. Oh, and I haven’t yet figured out how to get better results when the lighting is bad (like night-shots). So I’m certainly up to hearing some tips and tricks from you guys to help me out!

Here are my basic rules when taking pictures for the blog:


Rule #1: No flash

I don’t ever use the flash. Ever. 99% of the time whatever natural light is going on makes for a better picture than a flash-y one. That other 1% has me digging up more lamps and such to get more natural light in a space. I can’t think of one instance where the flash should be used.

Rule #2: Take several pictures from different angles because you just never know.

Sometimes I take a standard, straight-on shot and then a from-the-side one, and find I am digging the from-the-side shot more than I thought I would. For instance, in the last Frugal Photo Friday post from October, I used both a straight-on shot of my flowers weeds:


And a shot from the bottom focusing more on my textured balls of yarn. Because I couldn’t decide which I liked better, haha.


Rule #3: Composition makes a huge difference.

Ever see a picture that should have been a great one, but you feel like something is “off?” Or maybe it is reversed, there is a random shot that you love, but can’t figure out why? In both cases, there is something you can’t put your finger on. I’ll tell you what it is..it is the composition of the picture.

I had never heard of picture composition until reading this post, but then it all seemed to make sense! She explains it thoroughly in her post, but basically you should position the main focus of your picture on a certain point of the frame for the picture to “make sense.” Yeah, on second thought, I’ll stop trying to explain it...just go read this post. She does a much better job. :)

I try to keep the composition in mind and play around with different angles until it feels right. Kinda like the difference between this picture of Judah (which wasn’t frame-worthy)…


And this one after repositioning myself so the composition was better. See the difference in how “together” it feels?


Rule #4: Be aware of things like shadows, windows and direct sunlight.

Sometimes these things just can’t be helped, but try to move away from windows, bring in more light, etc. when necessary. It is just one of those things you will have to adjust for every situation.

Rule #5: Do what ya gotta do for a nice, clean shot.

Basically, rule out background stuff. When I take pictures of my products for Etsy, this is my setup:


All I use is a big piece of white material that I IRON FIRST (pleaseohplease don’t forget that part) and lay out nice and smooth and ‘drape-y.”  You can see that I use the highly technical method of cans of pens and markers to hold it in the right place. I chose this location because it is next to the window, giving me lots of natural light. It works great!

I’ve picked up on other little things along the way, like that this setup doesn’t work in the morning. The light has a blueish tint to it then. Nor does it work with the sun is shining on the white fabric, because dude...light on white is bright. I just make that up. :)

I used this same setup for this Frugal photo a few weeks ago, only I used some polka-dot fabric instead. I’m still working on branching out to more colorful backdrops!


Even after following all of these rules, I still feel that my photos need a little more help to really make them pop out of your screen when you see them. I do a very minor bit of photo editing to each photo - and I’ll be back tomorrow to share those deets with you!

In the meantime, I’d love to hear what I’m doing wrong and more tips for better photos! What methods and rules do you have for photography? When you visit a blog, what characteristics do you like the photos to have?