Showing posts with label Seasonal. Show all posts

Sunday, November 30, 2014

Cyber Monday: 30% off! (And Last Day to Save)

We're wrapping up our Black Weekend event with a cyber Monday sale: 30% off your order!


This is the last day to get a discount at So Sew Organized. If you have been putting it off, now is your chance! Use the code CYBER30 to get 30% off your entire order. Offer ends at midnight Monday night!

I've been busy sewing away and am so thankful for those of you that have taken advantage of the sales this weekend. I trust that So Sew Organized can be a blessing to you this holiday season, and that you will remember the One that gave us the Ultimate Gift...the true reason behind our Christmas.

Need some more gift inspiration? Check out these selections from the shop:


Totes and scarves make great pairings!


One of my new favourite things to do it pair two different colored scarves with an outfit. It adds a nice fullness and warmth plus the different stripes of color is fun! (pictured is the purple with dark gray, and navy with light gray.) Adding multiple things to your order helps save on shipping, too!


These burlap totes have been a hit, too. They are machine washable, and shed very minimally. It would be a great gift to fill a tote for a teen girl or adult lady instead of a traditional stocking! What gal doesn't want another handbag??


What items catch your eye? Which ones would you love to give...or receive!....this year?


Wednesday, October 15, 2014

Hot Caramel Apple Cider

One of the fun things about the changing seasons is the flavors that come with each one. This fall, I've been enjoying some of the autumn flavors - one of them being this hot apple cider.


It is so simple, I've just been keeping these ingredients on hand so I can enjoy this often. In fact, some days I drink this instead of my afternoon cup of coffee...that is a big step, folks! It is just that good!

Just pour apple cider into a mug with a little squirt of caramel syrup. Heat in the microwave (or on the stove top if you prefer) to a comfortable temperature.

Top with whipped cream and a caramel drizzle. A dash of cinnamon might be good too!

And enjoy the taste of fall!

I love to pair this with a homemade pumpkin scone (I use this recipe.) Yum!


What are your favourite flavors of fall? I'd love some new recipes to try, leave them in the comments!


Tuesday, July 15, 2014

Organizing your Vehicle for Summer Fun!

Now that summer weather has finally arrived, I for one find myself spending a lot of time in my vehicle! Between work, events with family, local events such as this, or church events, there are lots of great reasons to be on the go. The lack of organization in my car, however, was starting to drive me nuts! For something we use often, it is easy to let the cleanliness slide.
So I decided to do something about it!


I started by cleaning and vacuuming out the entire inside. I found all kinds of garbage under the seats…gross! How does that happen?

Once it was all sparkling clean, I made a list of the different items I wanted to put back in the car to be prepared for whatever a day might bring.

Read the rest of my contributor post at Imperfect Homemaker!


Linked up to the Weekend Wind-Down Party, Link Party Palooza, The Creative Collection, Say G'day, The DIY Dreamer

Wednesday, July 9, 2014

Patriotic Strawberries

I had so much fun celebrating Independence Day this year! I wore lots of red, white and blue, painted my nails to match, and sang American songs. Even though I only lived out of the county for 3 years, being back gives such a sense of pride to belong to the land of the free!

We celebrated for two days, with picnics at my cousins house, movies, games, parade, and fireworks. I decided to make some of these fun Patriotic strawberries for the occassion! You may have seen these floating around Pinterest (Do you follow So Sew Organized?) and I had made them a few years back so I knew how easy they were.

And friends, they are so, so yummy! They were a big hit with adults and kids alike!! The perfect amount of sweet, juicy, crunchiness. Because that is a thing, don't you know. :)


You can make your own, too...they are super simple!

Start by washing your strawberries and picking out the best ones for dipping.


Melt your white chocolate. I put mine in a one cup glass measuring cup so it would be deep enough to dip the strawberries.


Let the bottom of the strawberry drip off good...you might even want to scrape the tip slightly. Too much chocolate will cause a problem when you dip it in sugar.

Once your strawberry is thinly coated in chocolate, dip the tip in blue sugar. (You can purchase this in the baking section or make your own with blue food coloring.)

You will have to practice and find a technique that works for you. I find it easiest to have a little depression in the middle of the sugar, and then gently pat each side of the strawberry in the sugar. You have to be quick though...the longer you stay on this step, the more likely you are to have drippy, blue chocolate. :)


Lay your completed strawberry on waxed paper. Chill them in the refrigerator until you are ready to serve!


You could totally change this up for different occasions. Canadians, use red sugar instead of blue! At Christmas, use green sugar!! Use different colours for a party, rainbow effect. These are just SO good, you are going to want them for every occasion.

I made up a large box of strawberries (I think it might have been 2 quarts but I'm not really sure??) and it took me, maybe an hour? It is a little bit time-consuming but so totally worth the effort. That many strawberries seemed to be a good amount for the 20-ish people that celebrated with us.

Let me know if you try them!! What fun foods did you make or eat for the Fourth of July?


Linked up to the Lou Lou Girls, Link Party Palooza, Weekend Wind-Down


Wednesday, September 25, 2013

Fighting Coughs and Colds

I mentioned the other day that we are definitely in the middle of cough and cold season. With temps all over the place the last few weeks (80s? Check. 40s? Check. And everywhere in between!) it is no wonder that people are getting sick.

My siblings caught colds several weeks ago, and for some the cough and congestion is still lingering on. I’ve managed to steer clear of it already this season, so I thought it was time for an update about my fighting-a-cold methods!

You might remember that last winter I got tired of being sick all.the.time. {that is no exaggeration} so I started implementing some natural methods to help strengthen my immune system. Now, I am no doctor and don’t know much about natural remedies.I just gathered some info from other sites and tried a few things.


And it worked. Remember how I got so sick after I stopped? Yes, I am fully a believer in these remedies now!

This year I’m streamlining the process a little to be more cost effective and a bit easier. Let me explain..

Last year I was buying fresh lemons every week and squeezing them into a pitcher of water to drink from during the day. This worked fine, but I decided to eliminate a) having to buy lemons every week, and b) having my own pitcher of water sitting around all the time.

The real deal breaker was over the summer, when that lemon water would go bad after 1 day in the heat and humidity. Not very yummy!

This year, I’m purchasing this product instead:


Found in the organic section of my local grocery store, this is simply squeezed lemon juice - nothing more. This is different than the large green bottle you might buy for cooking - that is a lemon juice concentrate with water and preservatives added. This glass bottle that I am now buying is only lemon juice.

Basically this takes some of the work out for me, plus in the long run it is cheaper. I paid about $5 for this bottle, and my mom and I have both been using it for a month or more. I just pour a tiny bit into my glass of water once a day. The rest of the day I just drink plain water.

I also add about a teaspoon to the fruit smoothies I’ve been making for breakfast every morning, and a bit to my tea. Speaking of tea, here is what I am currently loving:


The Chammomile Mint and Sweet Dreams ones are my favourite. I occasionally drink these in the evening, especially if I feel a sore throat coming on. I use pure honey to sweeten it some.


It works every time, a sore throat never lasts more than a few hours! I found this honey in the organic section of my grocery store as well. I paid about the same for this bottle as you would for the normal honey, so really, why not get the good stuff? One thing I’ve noticed about this is that it doesn’t crystalize like the other honey...interesting!

The last product I occasionally use is Emergen-C.


 I became a believer of this stuff during my college days, and I find it to be effective on days when my body feels worn down, or I can feel myself fighting a cold. The vitamin C helps my immune system and also gives me a bit more energy.

Besides these products, I continue to work on drinking lots of water each day. I notice a definite decline in how I feel overall when I don’t!

So that is a bit on what I am doing this season to combat the sickness that is inevitably going around. I’d love to hear what you do - whether it is natural remedies or not - to help your immune system, your energy level, and your overall health! Any tried-and-true stuff I don’t know about?

Wednesday, March 6, 2013

My Regiment of {Natural} Remedies


I’ve been battling a cold for over a week now. It is finally starting to clear up! ‘Tis the season - not for Christmas, but for colds and flu!

The last two winters I have really had an issue with head colds. I don’t remember ever being sick so often in my life! Every few weeks it seems I am coming down with another head cold or nasty, bad cough.

This time around, I decided to attack that cold with a vengeance. Well, not really attack it..just arm myself to try to beat that thang and build my system up.

I dislike taking any type of pills or medications. Namely, I never take any. So I’ve made some attempts in the last two weeks to start a regiment of natural solutions.

The first is Apple Cider Vinegar in water {known as ACV water}. I’ve taken this off and on in the past, and it does seem to help. It boots your immune system and also helps balance your pH levels. We’ve normally taken a small amount each morning and evening, but there are some who drink ACV water all day long. {You can add a small amount of natural sweetener to it as well, to help make the taste more bearable!} {here is a great post if you want to read up on that!}

Lately, I have been finding that the ACV water gives me canker sores in my mouth...I guess my pH levels don’t need balancing! So I’ve cut back on my usage and have just taken small amounts at a time. It really helps clear up the mucous in my mouth and throat, which was a huge blessing when I was trying to sleep! {Hacking up a lung is not very conducive to sleeping. FYI.}

So instead of ACV water, I’ve been drinking lemon water all the live long day. I just squeeze the juice from half a lemon into a pitcher of water {about a liter?} and drink several glasses throughout the day. This is also supposed to boost your immune system. {here is a great post that mentions lemon water and some other natural remedies}

Normally I have a hard, hard time drinking water during the winter. I know I have to, and I force some down my throat each day, but I’d rather wrap myself around a mug of some steamy hotness during the winter months. {And besides, coffee and tea are mostly water...so it counts, right?} But since I started drinking the lemon water, I’ve been drinking WAY more water in a day. In fact, I want to drink more! I really don’t know why, because it isn’t like it is that good or anything special, but it has really helped me. Just getting more water into me is probably going to help quite a bit, lemon or no!

Since I’ve been drinking more, I’ve seen an increase in my energy level...even though I wasn’t feeling well. I still felt somewhat chipper and alert even though I was barking like a seal. {And blowing my nose like...well, we won’t say what like. :) } Water is so, so good for you!

I mixed some honey and lemon juice to help reduce the coughing, especially at night. {Taking a sip of the ACV water helped this too, as I mentioned.} Just mix enough lemon juice to thin the consistency of the honey somewhat...and this really helps! I did have some Vitamin C cough drops, but I found they were not touching this cough at all. The honey and lemon, however, was a bit help. I just took a spoonful or two whenever I woke up in the night...so every couple of hours or so.

I also would fix an old fashioned cup of tea to sip before bed, and added honey and some fresh lemon to that as well. If nothing else it was very soothing. :) Plus the honey and lemon were helping the cough.

So...now to see if these things work for the long haul. :) I definitely started seeing improvements once I started this regiment of remedies, and I’m hoping that all the lemon water will help support my immune system so I do not catch another cold so easily! We’ll see what happens!!

I’d love to hear what works for you in the way of natural remedies...what else could I try? Are you prone to get colds and flu in the winter months? How do you battle it?

Update: Want to see how these remedies worked after experimenting for a couple of months? Click here for an update post!


Note: I’m certainly no doctor, and I don’t even know much about natural remedies {although I’d love to know more and am trying to learn!} I am just a girl that got tired of barking like a seal all winter and decided to try some things. These remedies are not meant to cure any of your ailments, so don’t bank on my advice. Consult your doctor {or at least someone smarter than I am} to learn what you should do in your situation. 

Thursday, February 21, 2013

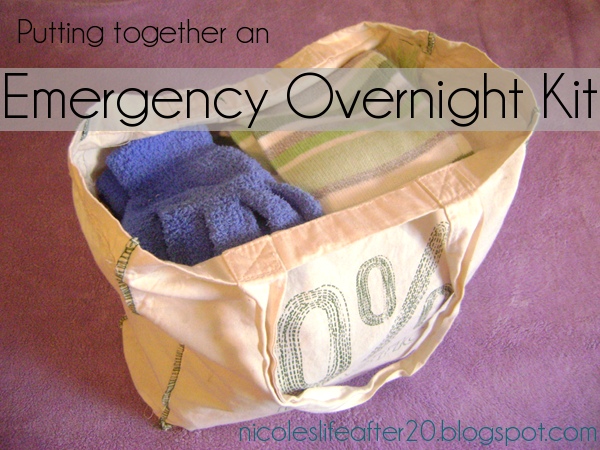
My Emergency Overnight Kit


Living here in the Maritimes, there is one thing that is sure, and that is that you can’t be sure about the weather. {wink!} It can be raining in the morning, snowing in the afternoon, and sunny by evening. Or it can be snowing without a cloud in the sky. {no joke!} After living here 2½ years, I’ve learned to just be prepared for any kind of weather!

As winter was approaching this year, I decided it would be a good idea to put together an emergency overnight bag to keep in the car when I go to church on Sundays. I wanted to be prepared for any situation:

    ...there are 80ish kilometers between my house and church. The differences in the weather between the two places can be as different as night and day!
    ...I stay at church all day, so there are bound to be changes in the weather in the course of a day {see above}
    …even though I don’t plan on getting in an accident, I want to be prepared in the unlikely event that were to happen!


So, I grabbed some items to put together this emergency kit. I included:

A change of clothes, including a long-sleeve tee and a sweatshirt, a skirt and a pair of pants, knee socks, ankle socks, and some other, um, essentials. {wink!}

Pj’s

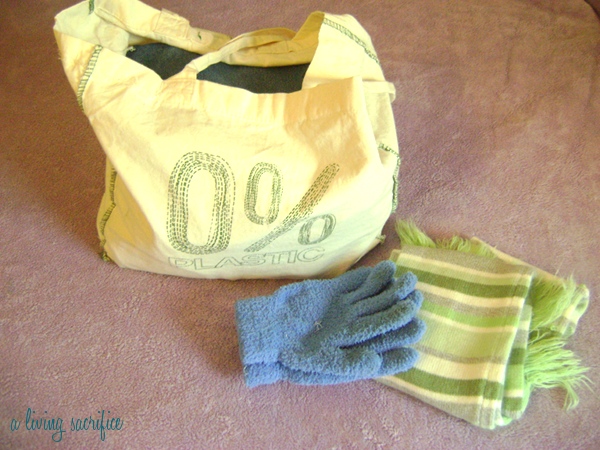
Gloves

Scarf

Boots

Hat

I folded up these items neatly and popped them in a reuseable bag.


There are a lot of other things that could be included in this type of bag, such as:

Extra personal care items, including makeup, hair items, razor, ect.

Flashlight (we keep one of these in the car anyway!)

First aid kit

Blanket

Poncho

Small travel or neck pillow

I didn’t add any of these things for various reasons, such as I already take makeup and some personal care items with me each week to freshen up before the evening service. {Do people still “freshen up” these days or am I the only one?}

I’ve been keeping my emergency kit in the back of the van all winter, and boy am I sure glad I did! I got a chance to use my kit this last Sunday. During the morning service, it was raining, but not badly. About mid-way through the afternoon, that changed to a freezing mix, which then changed to snow and wind that gave us blizzard conditions. The snow was blowing so bad we could barely see out the windows, and the freezing rain had made the road very slick. We canceled church that evening, and I got to spend the night with my pastor’s family. Always a fun time!

So now you see what I mean about never being sure about the weather - ha! I’m just super glad I was prepared and had a change of clothes along. I’ve restocked my bag, and plan to continue using it as long as the winter weather lasts!

Do you put together any type of emergency bag for the winter months? What other things do you include? Anything else I should pop into my kit?


Thursday, December 6, 2012

Christmas Food: Coconut Snowmen

coconut snowmen


Years ago, my mom found this recipe in a Taste of Home magazine. She made these cute little buggers way back then, but vowed it was so stressful she’d never do it again.

You know where I’m going with this.

This year, she planned our yearly Ladies Christmas party with a snowman theme. Yup, these cute guys needed to make an appearance!

She has tweaked the recipe some in ways that seem to make it easier to put together. This time she declared them “a little stressful”… so apparently practice makes perfect?? Ha!

Here is the recipe and her updated techniques:

Coconut Snowmen
4 cups flaked coconut, coarsely chopped
3 ¾ cups confectioners sugar
⅔ cup sweetened condensed milk
¼ cup butter, softened
White candy melts
Milk chocolate candy melts
1 package large marshmallows
Decorator gel icing (orange for the nose, red for the holly, another color for the eyes and mouth)
Green leaf-shaped candies (found in christmas sprinkles)


To make the coconut ball:
Combine coconut, confectioner’s sugar, milk and butter. Shape into 1 ¼ inch balls; place on waxed paper-lined cookie sheets. Chill for 1 ¼ hours or until firm.

To make them into snowmen:
Melt your white candy melts. {We put it in a bowl and set it on a hot griddle to keep it softened and warm while we are working with it. You can melt it in the microwave, too.} Once it is melted and stirred smooth, dip coconut balls; place on waxed paper cookie sheets. Chill until firm, about 15 minutes.

snowman bodies


Melt the milk chocolate candy melts. When it is softened and smooth, dip each marshmallow in until completely covered. Set on waxed paper cookie sheets, allowing the excess to pool around the bottom and make the brim of the “hat.” Chill until firm, about 15 minutes.

snowman marshmallow hats


{A note about this dipping process: this is the stressful part, making these come out looking like you want. This time, mom found using a fork was the best method - piercing the top of the coconut balls or marshmallows with a fork and dipping them into the melted chocolate, then transferring them onto waxed paper. The top of the coconut ball will not be seen anyway, and she just dropped a little more chocolate on top of the marshmallow after placing it on the waxed paper, to cover up the fork holes. Just find what works best for you!}

With a knife, level the top of the coconut balls. Use a dab of melted white chocolate to attach the marshmallow “hats” onto the ball.

snowman together


Use gel icing to add eyes, mouth, and nose. Add “holly’ to the front of each hat. Be creative! What other embellishments could you use?

finished snowmen


This recipe yields about 4 dozen coconut balls. How many snowman you end up with depends on your patience. :)

I wish I had more pictures of the "afters" because they were just so stinkin' cute, there wasn't much time for picture taking. These guys didn't last very long! Chocolate and marshmallow is pretty much one of my favorite combinations...it makes the coconut worth it, in my opinion, lol!

Have you been doing any holiday baking? Let me know if you try this recipe!

Linked up with Kraven It!


Or so she says


Wednesday, December 5, 2012

My Own Christmas Decor

If you follow my Facebook page, you might remember a few weeks ago when my siblings "christmas-bombed" my room...


Well, I lived with it that way for a week...simply because I didn't have a chance to change it! The time came, however, when I just couldn't put up with the cluttery feeling any more. It was time to do some decorating on my own!

I started by taking everything down and out that I didn't want. I pulled my Christmas totes out of the attic, and started unpacking things.

I feel like I have a lot of Christmas stuff. Considering the fact that I don't yet have my own home to decorate, but I have enough stuff to decorate a whole house. Most of my stuff has a lot of sentimental value, so it is hard to decide what gets put out and what stays packed away! So I came up with a plan...I wanted to keep things very simple, with a red and white theme. That helped determine what to use! Here is my main focal point, the top of my dresser:

Christmas dresser


I (cleaned off the top of the dresser and then) covered it with a white faux sheepskin-type piece of material. On top, I put these special ceramic pieces:

Santa


My Nana painted these waaaay back in the 70's, but as long as I can remember she set them out each year, and often I was the one to help her. When she passed away 9 (!!) years ago, my mom took these and has since passed them on to me.

I personally think she did a great job. Santa and Mrs. Claus are sitting on ceramic benches. Mrs. Clause is mending Santa's hat, and Santa is painting a sled (which balances precariously on his hand...and scares the bejeezers out of me when it falls off unexpectedly.)

santas paint


In between these two, I empties the bowl that held my textured balls of yarn before, and filled it with red and white Christmas ribbons. Easy, matches the color scheme, and it was free! win, win!


christmas bows


Above Mrs. Claus' head, I swapped out some art from my gallery wall to help tie everything together.

wall christmas art


I hung a small Christmas spatula, covered one picture like a present, and then popped another piece of pretty wrapping paper in the other frame. Again, easy and free!

close up of wall art


Further down the wall I included my Subway Art Bucket list, right where I can see it every day. Love it!

subway art


Here is a shot of the gallery wall as it looks now:

gallery wall christmasized


The other changes I made to the room were just simple things, swapping out normal decor for Christmas stuff. Like this shelf over my headboard...

shelf christmasized


Other than my not-so-glamorous alarm clock (ha!) I just popped a few things on the shelf to "Christmasize" it. I hung several snowman ornaments from the pegs to at least display some of my ornaments!

I also pushed some books back on my shelf to make room for my manger scene, which I've had since I was a very little girl. I believe my great-grandmother gave it to me.

bookshelf christmasized


And that is all! My siblings like to walk in my room and say, "when are you going to decorate in here?" because they don't think I did enough decorating. :) I, however, am enjoying the minimalistic approach, and the red and white vibe throughout. Plus, the sentimental value of these things means more than a room full of decor!

Where do you fall on the decorating bandwagon? Do you keep things simple or go "all out?" any sentimental items you couldn't part with?


Tuesday, November 27, 2012

Top Ten Tuesday: Christmas Classics


This is the time of year to dust off those Christmas movies and enjoy some great Christmas stories! There are tons and tons of Christmas movies out there (it is seriously getting crazy...especially since a whole lot of them have similar story lines) but there are a few that must be watched year after year.  Here is our list of ten Christmas movies to get you in the Christmas spirit:

1. Rudolph the red-nosed Reindeer

2. Frosty the Snowman
3. Miracle on 34th Street

4. White Christmas

5. Its a Wonderful Life

6. The Music Box

7. Muppet’s Christmas Carol

8. Little House on the Prairie: The Christmas they Never Forgot (I’ll admit, this one is a bit of a snooze...but my sisters think it is the greatest thing ever.)

9. Christmas Shoes (snif!)

10. Charlie Brown Christmas

What classic Christmas movies do you watch each year?

Last Top Ten: Funnies


Friday, November 16, 2012

A Closet Purge-fest

It is getting closer and closer to a time of year I despise: winter! Freezing coldness + snow = not my cup of tea! But the fact is, I live in the North (and I’m proud of it) so I have to put up with a few months of the freezing cold white stuff. Such is life!

Winter brings a whole new wardrobe. Out with the old, on with the new, so to speak. I have a large tote full to the brim of winter wear...and once cool weather hits, out it comes! I unpack last year’s warm clothes, purge out everything I no longer want, and pack away most of my summer gear. See ya in July, flip flops!

It takes a bit of time, but I’m so glad I make it a priority to clean out, purge, and pack away. It helps keep my clothes pared down to what I really wear, and helps with storage and closet space! Here are the tips that work for me:

1. Evaluate what you like and will really wear. I’ve learned the hard way over the years, that no matter how cute or functional I think an item is, if I don’t feel secure in it, I won’t wear it. Now, I used to get picked on for labeling my clothes as secure or insecure, but that is really the best way to describe it! Haven’t you ever put together an outfit or put on a new item...and it fits, and its nice….you can’t put your finger on it, but something just doesn’t feel right. Insecurity, people! That's what it is! The garment just isn’t you...and if you are like me, you won’t wear it because of that insecure feeling. So don’t leave those insecure clothes around, its pretty pointless to take up precious space with something you don’t wear!

That being said,

2. Be ruthless. I’ve adopted the policy that, if I didn’t wear it over the last season, I’m not going to wear it during the next. A t-shirt that sat in the bottom of my drawer all summer is getting sent to the donation pile, no ifs, ands or buts. I still feel like I have a ton of clothes, but being strict with myself on this one point keeps them pared down to what I really wear.

Some things still slip through the cracks… for instance, this time around I found a pair of socks from my junior high days. Clearly, because I haven’t been into the Tazmanian Devil for at least 10 years.


Who knows why I still had those!

3. Remember you will get more clothes. Don’t keep something because you might need it someday. I used to do this all the time, but the fact is I’m always getting new-to-me clothes. Just recently a friend gave me a huge bag of clothes. My winter coat was a hand-me-down last year. If you are willing to take them, people are always giving away clothes. We are blessed to have great clothing thrift stores in our area where we can get brand new, name brand clothes for cheap, cheap, cheap! So if there is something I really need, I will either wait for it to be handed down to me, or look for it in a thrift store. There is no need to keep things I may or may not ever need.

My method for this whole process went something like this:

    Dig out tote of winter clothes
    Pull all summer wear out of dresser and closet
    Sort into piles: keep, donate, sell, chuck {more on donating/selling in a minute}


    Begin to take winter gear out of tote - put it away or add to donate pile, whichever is appropriate
    Make more room in drawers, because for Pete’s sake winter clothes take up a lot of room!
    Keep some summer wear out {I still wear t-shirts under sweaters and such, so I keep a few out for that type of thing.}
    Pack everything else away in tote. {including sandals, flip flops, and summery skirts.}
    Enjoy your nicely organized dresser and closet!

I normally donate everything I don’t want any more {unless it is ripped or stretched out} but this year I decided to try listing a few things on Kijiji. Only things that were in like-new condition: mostly things that had been given to me that I didn’t want. I’ve only listed a handful of items, and haven’t sold any yet, but if worse comes to worse I will just add them to the donation bag!


This process works well for me, now I'd love to hear what you do! Do you wear the same wardrobe year-round? How do you determine if you are going to get rid of an item? Have you tried selling second hand clothes before? What about those insecure items?


Thursday, November 15, 2012

39 Days 'Til Christmas! All the Christmas Printables

It is hard to believe that Christmas is only about 40 days away! Time to get serious about planning (and blogging!) lots of Christmas goodies!

Last year, I shared our Christmas traditions along with some new food and decor ideas (thanks Pinterest!) randomly throughout the month of December. (You can browse through those posts by clicking here and scrolling down through the old posts.) I'm planning on doing the same this year, and squeezing in as much Christmas goodness as I can!

Over the next 40 days, I will be blogging frequently about Christmas - recipes, activities, and general planning to help you be motivated and give you suggestions and ideas! If there is one thing I love to read about, its Christmas, and there is so much inspiration to be gained from others that I hope to share with you!

To kick off the Christmas spirit, I have another new Christmas planning printable to add to our arsenal. (Plus, I need all the Christmas printables in one post, so I'm killing two birds with one stone.)

Here are the Christmas printables available for free just by requesting them in the comments section of this post:

A Christmas countdown, beginning December 1st:


Keep track of the gifts you need to still purchase, including where to get it and what your price range is:


Don't forget the most important part: Christmas food! Includes a spot to jot down where the recipe is located:


Printable 3x5 recipe cards:


Or a recipe page. Either of these would make a great gift if you compiled the recipes!

Please remember to include your name for the personalization on this!

And the infamous To-do list, to help you keep your head on your shoulders:


The brandy-new one I am introducing today is an Address Book! Here is a close up of the first page so you can see the details:


Besides the normal name, address, phone number and web info, this page also includes a place to mark if you sent or received a gift or card, and if you sent a thank you note or not! So much function packed in one place, this will make your gift and card giving so much easier!

The second page has all the same info, but can be printed off again and again as many times as you need. You can even mark the page numbers to keep everything straight. Should prevent headache!


All you have to do to makes these printables your own is leave a comment below including your email address. Be sure to also include your name for the personalization of the recipe page (or the name of the person receiving the page...or both!)

I'd love ideas for other planning pages that would be a help to you this season. Let me know, and I'll do my best to create what you need!

How are you doing with Christmas prep this year? Are all your gifts purchased yet? Decor up? Here in Canada, Thanksgiving has already come and gone, and many places are already playing Christmas music. Doesn't it seem "too early?"