I had so much fun celebrating Independence Day this year! I wore lots of red, white and blue, painted my nails to match, and sang American songs. Even though I only lived out of the county for 3 years, being back gives such a sense of pride to belong to the land of the free!
We celebrated for two days, with picnics at my cousins house, movies, games, parade, and fireworks. I decided to make some of these fun Patriotic strawberries for the occassion! You may have seen these floating around Pinterest (Do you follow So Sew Organized?) and I had made them a few years back so I knew how easy they were.
And friends, they are so, so yummy! They were a big hit with adults and kids alike!! The perfect amount of sweet, juicy, crunchiness. Because that is a thing, don't you know. :)
You can make your own, too...they are super simple!
Start by washing your strawberries and picking out the best ones for dipping.
Melt your white chocolate. I put mine in a one cup glass measuring cup so it would be deep enough to dip the strawberries.
Let the bottom of the strawberry drip off good...you might even want to scrape the tip slightly. Too much chocolate will cause a problem when you dip it in sugar.
Once your strawberry is thinly coated in chocolate, dip the tip in blue sugar. (You can purchase this in the baking section or make your own with blue food coloring.)
You will have to practice and find a technique that works for you. I find it easiest to have a little depression in the middle of the sugar, and then gently pat each side of the strawberry in the sugar. You have to be quick though...the longer you stay on this step, the more likely you are to have drippy, blue chocolate. :)
Lay your completed strawberry on waxed paper. Chill them in the refrigerator until you are ready to serve!
You could totally change this up for different occasions. Canadians, use red sugar instead of blue! At Christmas, use green sugar!! Use different colours for a party, rainbow effect. These are just SO good, you are going to want them for every occasion.
I made up a large box of strawberries (I think it might have been 2 quarts but I'm not really sure??) and it took me, maybe an hour? It is a little bit time-consuming but so totally worth the effort. That many strawberries seemed to be a good amount for the 20-ish people that celebrated with us.
Let me know if you try them!! What fun foods did you make or eat for the Fourth of July?
Linked up to the Lou Lou Girls, Link Party Palooza, Weekend Wind-Down
Showing posts with label Pinterest Project. Show all posts
Wednesday, July 9, 2014
Thursday, January 2, 2014
Build-your-own Dessert Kabobs
On New Year's Eve my cousin and I put together a fun dessert to go along with the festivities. After searching pinterest for ideas we came up with these dessert kabobs! We wanted to keep things fun and flexible to each person's likes and dislikes, so we laid out options and let them build their own kabob the way they wanted it.
We included strawberries, bananas, cubes of pound cake, marshmallows, rice krispy treats, and chocolate sauce to drizzle on at the end.
I made brownies to go on it, too, but they were too moist, they wouldn't stay on the stick! I guess that's a good problem to have???
The finished product was SO yummy, if I do say so myself. :)
Did you do anything fun for New Years? I heard that only 8% of people go out on New Year's Eve, were you one of them? Any new party ideas to share?
We included strawberries, bananas, cubes of pound cake, marshmallows, rice krispy treats, and chocolate sauce to drizzle on at the end.
I made brownies to go on it, too, but they were too moist, they wouldn't stay on the stick! I guess that's a good problem to have???
The finished product was SO yummy, if I do say so myself. :)
Did you do anything fun for New Years? I heard that only 8% of people go out on New Year's Eve, were you one of them? Any new party ideas to share?
Thursday, May 9, 2013
Dresser Decor Inspiration {In which I break out a fancy word}
I enjoy the small amount of decorating I get to do in my home, but in the past I have not been very intentional about broadening my horizons and trying new things. This year, I’m making an effort to make the decor in my bedroom - slash - office - slash - shop - slash - crafting room practical and inspirational. A room with that many uses has to be all that and organized, to boot!
An inspirational work space was becoming increasingly important to me, and what I had going on in the space was not working for me anymore. I decided to be a bit more intentional in my decor, putting thought into what I actually wanted instead of just slapping a few things up and calling it a day. I started dreaming up plans for the space - beginning with my vintage wood dresser.
And here is where my fancy word comes in.
What do you call it when you are decorating the top of a dresser? I was thinking of it as a sort of mantle arrangement, but a mantle it is not. Tablescape won’t work either. After scouring around for some ideas {you’d be surprised, “top of dresser” does bring up some search results in Pinterest} I decided on this fancy word: Vignette.
Doesn’t it just look and sound fancy to you? {Seriously, say it out loud.} I believe this is the right word for this type of top-of-something arrangement of random items.
I looked up vignette in the dictionary, and the basic meaning was “a small portrait that fades into the background without a border.” And I decided that was a good name for this type of decor. I do want it to be beautiful, but to “fade into the background” so to speak...to add to the room, but not be all like, “HELLO, I’M DECORATED!”
So, I’m creating a vignette...now what?
That is what I continued to ask myself, “How does one go about deciding on an arrangement of random items that works?” Well first of all, you scour the blog-land and Pinterest for ideas. Here are some of my favorites:
There is always a common theme of tall and short items, textured and smooth, with complimenting height and depth. I found that I love vignettes with a very specific colour scheme, but I’d be pushing my luck to think I could get that fancy on my first effort at this thing. :)
Tomorrow, I’ll share the end result...after several weeks of collecting items, ideas, and putting it all together. I have a great blank slate to work with…
...well, if you ignore the phone. :) Too bad that has to be right. there!
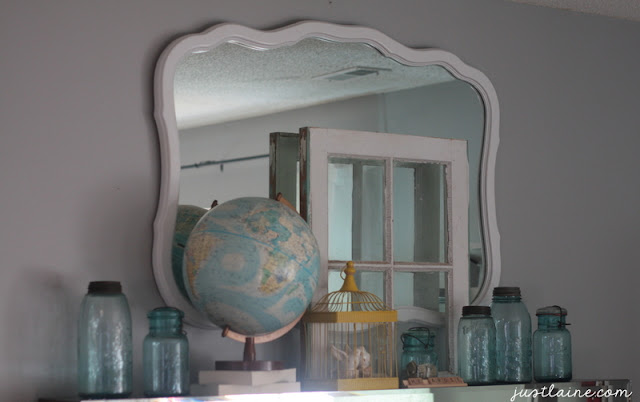
Here is a teaser to give you an idea of the space as it’s looking today:
Come back tomorrow for the final result! =)
An inspirational work space was becoming increasingly important to me, and what I had going on in the space was not working for me anymore. I decided to be a bit more intentional in my decor, putting thought into what I actually wanted instead of just slapping a few things up and calling it a day. I started dreaming up plans for the space - beginning with my vintage wood dresser.
And here is where my fancy word comes in.
What do you call it when you are decorating the top of a dresser? I was thinking of it as a sort of mantle arrangement, but a mantle it is not. Tablescape won’t work either. After scouring around for some ideas {you’d be surprised, “top of dresser” does bring up some search results in Pinterest} I decided on this fancy word: Vignette.
Doesn’t it just look and sound fancy to you? {Seriously, say it out loud.} I believe this is the right word for this type of top-of-something arrangement of random items.
I looked up vignette in the dictionary, and the basic meaning was “a small portrait that fades into the background without a border.” And I decided that was a good name for this type of decor. I do want it to be beautiful, but to “fade into the background” so to speak...to add to the room, but not be all like, “HELLO, I’M DECORATED!”
So, I’m creating a vignette...now what?
That is what I continued to ask myself, “How does one go about deciding on an arrangement of random items that works?” Well first of all, you scour the blog-land and Pinterest for ideas. Here are some of my favorites:
| It's Just Laine |
| pennies'n'grace |
There is always a common theme of tall and short items, textured and smooth, with complimenting height and depth. I found that I love vignettes with a very specific colour scheme, but I’d be pushing my luck to think I could get that fancy on my first effort at this thing. :)
Tomorrow, I’ll share the end result...after several weeks of collecting items, ideas, and putting it all together. I have a great blank slate to work with…
...well, if you ignore the phone. :) Too bad that has to be right. there!
Here is a teaser to give you an idea of the space as it’s looking today:
Come back tomorrow for the final result! =)
Thursday, October 18, 2012
Pumpkin and Apple Carving
I helped decorate for our Harvest Supper last Saturday, and knew that some fun seasonal stuff was in order. I decided to try my hand at carving pumpkins and apples. Yup, even apples.
I turned to Pinterest for most of my inspiration, so you could call this my Pinterest-inspired project for October as well. There are lots of different pins floating around that show pumpkins with the skin carved off into different things, so I decided to try my hand at it. I totally just did my own thing and made it up as I went along.
I started by writing the word "THANKS" on my pumpkin with a Sharpie.
Then I turned it into nice big block letters that I could carve.
Now, if you have really nice writing or are fancy-pants crafty, you could make nice calligraphic letters and make it all beautiful. But fancy-pants I am not, so block letters was the way to go.
I ever-so-carefully cut in to the skin with a razor blade, and then peeled the skin away in little chunks. It turned out to be very easy!
The skin was really soft and easy to work with. The hardest part was knowing how deep to cut into the flesh and making it all nice and even looking. So I enlisted the help of a cute baby.
Actually he kept asking to sit in my lap (curious as a cat!) and would beat his hands on the pumpkin. Then he would get down to play with toys. We repeated that process every few minutes until....
Ta-da! All finished!
A couple things I wasn't expecting. See how nice and orange the flesh is on this side of the pumkin...
The farther right I went, the more green it got.
I wished the whole thing was that nice orange color (guess I was digging the tone-on-tone look) but my mom thought the green made it stand out more, so whatever.
The other thing that surprised me was that the thing was juicy. As soon as I pierced the skin, it started...I don't know what to call it...bleeding? weeping? Anyway, the letters dripped for days. so now you know, carve pumpkin skin with a paper towel handy.
I only ended up doing the one pumpkin this way because I wasn't sure how it would hold up. I didn't want to carve half a dozen pumpkins and then have them all wilty by the supper. As it turned out, it still looked great a couple days later, so I'm filing that in my memory bank for next year!
My next project was the apples. Which my sister thought you needed a picture of.
I wanted to make apple tea lights. This was another easy-peasy project! I just traced a tea light on the top of an apple, and carefully cut the circle out with a regular paring knife.
I chipped away at it with the knife until all the large chunks were out, and then cleaned things up with a spoon.
Then I swirled some lemon juice and water in there, since that helps keep the apple from browning as soon.
Once the hole was smooth and deep enough, I just pushed a tea light in there.
I love how they turned out! We had great scents too, these candles were hazelnut, cherry, and mandarin melon. Yum!
Tomorrow I'll show you how I actually used these in decorating. I loved how they turned out! In the meantime, what crafty projects have you been doing for fall? Any Pinterest-inspired fall decor?
Want more Fall inspiration? Visit my Pinterest board, It's Fall, Y'all! (because I'm corny like that!)

I turned to Pinterest for most of my inspiration, so you could call this my Pinterest-inspired project for October as well. There are lots of different pins floating around that show pumpkins with the skin carved off into different things, so I decided to try my hand at it. I totally just did my own thing and made it up as I went along.
I started by writing the word "THANKS" on my pumpkin with a Sharpie.
Then I turned it into nice big block letters that I could carve.
Now, if you have really nice writing or are fancy-pants crafty, you could make nice calligraphic letters and make it all beautiful. But fancy-pants I am not, so block letters was the way to go.
I ever-so-carefully cut in to the skin with a razor blade, and then peeled the skin away in little chunks. It turned out to be very easy!
The skin was really soft and easy to work with. The hardest part was knowing how deep to cut into the flesh and making it all nice and even looking. So I enlisted the help of a cute baby.
Actually he kept asking to sit in my lap (curious as a cat!) and would beat his hands on the pumpkin. Then he would get down to play with toys. We repeated that process every few minutes until....
Ta-da! All finished!
A couple things I wasn't expecting. See how nice and orange the flesh is on this side of the pumkin...
The farther right I went, the more green it got.
I wished the whole thing was that nice orange color (guess I was digging the tone-on-tone look) but my mom thought the green made it stand out more, so whatever.
The other thing that surprised me was that the thing was juicy. As soon as I pierced the skin, it started...I don't know what to call it...bleeding? weeping? Anyway, the letters dripped for days. so now you know, carve pumpkin skin with a paper towel handy.
I only ended up doing the one pumpkin this way because I wasn't sure how it would hold up. I didn't want to carve half a dozen pumpkins and then have them all wilty by the supper. As it turned out, it still looked great a couple days later, so I'm filing that in my memory bank for next year!
My next project was the apples. Which my sister thought you needed a picture of.
I wanted to make apple tea lights. This was another easy-peasy project! I just traced a tea light on the top of an apple, and carefully cut the circle out with a regular paring knife.
I chipped away at it with the knife until all the large chunks were out, and then cleaned things up with a spoon.
Then I swirled some lemon juice and water in there, since that helps keep the apple from browning as soon.
Once the hole was smooth and deep enough, I just pushed a tea light in there.
I love how they turned out! We had great scents too, these candles were hazelnut, cherry, and mandarin melon. Yum!
Tomorrow I'll show you how I actually used these in decorating. I loved how they turned out! In the meantime, what crafty projects have you been doing for fall? Any Pinterest-inspired fall decor?
Want more Fall inspiration? Visit my Pinterest board, It's Fall, Y'all! (because I'm corny like that!)
Thursday, September 27, 2012
September Pinterest Project: Lavendar Sugar Scrub
This sugar scrub looked so easy, I knew I had to give it a try! I've been making these sugar scrubs for my shop for quite a while...
...and they are quick and easy as well. I've been looking to branch out and try some new ones, so this was perfect!
This is the original pin...
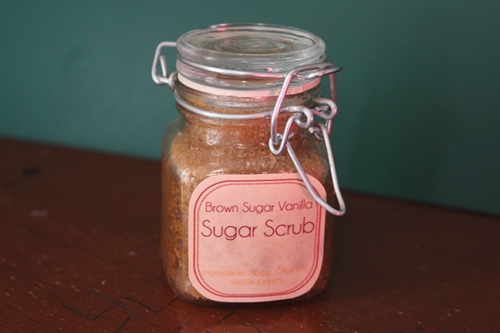
And here is mine!
This sugar scrub uses only two ingredients: white sugar, of course, and dish detergent. Yuppers!
I used this detergent, since Dawn Hand Renewal was the recommended choice. It works well!
We also have this on hand, so I may try it next. It was 50% off...in case you hadn't noticed.
Unlike the sugar scrub in my shop, this actually lathers up like soap (obviously, because it is) so the results are a little different. It still works great, though!
I've been using sugar scrubs a lot on my feet these days, because at this time of year my feet really itch when I'm trying to sleep! I'm not sure why! The scrub takes away all the dry skin and also moisturizes them, so it makes a huge difference.
Because of the soapy lather of this scrub, I decided to try using it as shaving cream. it worked well for that, too. I normally like a shaving cream with a lot of foam, but the lather of this worked fine.
Overall, I prefer my original scrub because of the ingredients...I know what is in it, whereas with this one there is some crazy stuff in the detergent that kinda scares me! It was nice for a bit of a change, though. Sugar scrubs make great gifts...I am looking forward to trying out some other ones I've found! Visit my Pinterest board to check some out for yourself.
Do you use or make sugar scrub? What ingredients are in yours? Have you made some nice colorful ones?
***Note: If you pin this scrub, please click through and pin from the original source. Thanks for being considerate!

...and they are quick and easy as well. I've been looking to branch out and try some new ones, so this was perfect!
This is the original pin...
And here is mine!
| It is hard to tell in this picture, but it is a lovely lavender color! |
This sugar scrub uses only two ingredients: white sugar, of course, and dish detergent. Yuppers!
I used this detergent, since Dawn Hand Renewal was the recommended choice. It works well!
We also have this on hand, so I may try it next. It was 50% off...in case you hadn't noticed.
Unlike the sugar scrub in my shop, this actually lathers up like soap (obviously, because it is) so the results are a little different. It still works great, though!
I've been using sugar scrubs a lot on my feet these days, because at this time of year my feet really itch when I'm trying to sleep! I'm not sure why! The scrub takes away all the dry skin and also moisturizes them, so it makes a huge difference.
Because of the soapy lather of this scrub, I decided to try using it as shaving cream. it worked well for that, too. I normally like a shaving cream with a lot of foam, but the lather of this worked fine.
Overall, I prefer my original scrub because of the ingredients...I know what is in it, whereas with this one there is some crazy stuff in the detergent that kinda scares me! It was nice for a bit of a change, though. Sugar scrubs make great gifts...I am looking forward to trying out some other ones I've found! Visit my Pinterest board to check some out for yourself.
Do you use or make sugar scrub? What ingredients are in yours? Have you made some nice colorful ones?
***Note: If you pin this scrub, please click through and pin from the original source. Thanks for being considerate!
Thursday, September 6, 2012
August Hot Happenings
Here is an update from the month of August at our house!
The kids enjoyed soaking up all the sun and ocean they could before cool weather sets in! This girl {loves} swimming in the ocean! Me...not so much!
Mom found Judah a swing. This picture is out of focus, but I think it is cute anyway! He is not all about the swing thing yet...a little insecure-feeling maybe?
His older brother, however...
August was a HUGE month for this little fella. He cut his first 4 teeth, pulled himself to standing, and learned to crawl! Our lives will never be the same!
I love, love, love this picture.
Justin waited 15 years to get a brother. Now that he has one, he really does make the most of it. Hes not like a lot of teen boys who won't get near a baby. Justin loves holding him and doing things with him from time to time. Sometimes Justin takes Judah out to sit on the lawn tractor or in the van so he can "drive" the steering wheel. Its a boy thing, I think. :)
An Uncertain Dream by Judith Miller. This is a historical fiction book that I own and have read before, but I was really itching for some easy reading, so I plucked this off my shelf and read it in like 2 sittings. (I actually woke up at 6 am. one morning and couldn’t go back to sleep, so I read half of it right then and there!) It is a decent fiction book, but like I said, it is easy reading. I don’t care to read too many of these types of books, they get boring and cheesy after a while! Let me be clear, also, that this is not a romance novel, either. I really don’t care for those at all! This is just fun historical fiction - my favorite kind of fiction!
Music in the Air by Mark Ward Sr. This is one of my favorite books! It is definitely on my “read every year” list! This book tells the story of the golden age of gospel radio. Beginning in the 1920’s, it gives stories and details of the men and music that made the radio age golden! It also has just enough technical details of the evolution of radio during this time to make it interesting. It also includes many of the stories behind hymns that were written or popularized during this age. It is a valuable book for anyone interested in Christian radio or music!

At dinner time, we’re continuing to read through the Little House on the Prairie series. We just finished up “The Long Winter” and started “Little Town on the Prairie.” These are two of my favorites! The various details of what it was like for a young person in that era are so interesting. The younger girls are enjoying it immensely...we usually read two or three chapters a day because one is just not enough!
I’ve chatted before how you never know what a month will hold when you set those goals, and this month was no exception. A large Etsy order that I wasn’t anticipating really threw my August for a loop, but I’m thankful for the things I did accomplish. I am thankful for these opportunities that get thrown my way! I’m eager to jump to them!
Here are the goals I set last month:
And here are the ones for September:
During the summer, I kinda slacked off working on one monthly habit like I mentioned here. I have, however, been trying to implement a few new things as I can, so here is a little update on some small habits I’m changing:
-Exercise more. I haven’t updated you on my exercising habits in a while! I am still walking several nights a week at the park. I need to measure for sure, but I think I’m going 2-3 miles each night. I also have started some simple low impact aerobic exercises each morning when I wake up. Just a little something to jump start my day and hopefully help me not gain weight this winter! As I develop a better routine (still experimenting and tweaking to find what works for me!) I’ll be sure to give you a run-down of my method. It is hard to get going each morning, but once I start I’m always glad I did!
-No more coffee after supper. I have tried cutting out an evening coffee to see if it will help me physically and help my sleeping habits. Caffeine does not usually bother my sleeping, but I wondered if maybe it secretly was in a not-as-noticeable way. Sneaky little bugger! So far I haven’t noticed any difference, but I’m still hoping this helps with my waking up habit. Speaking of..
-Better morning routine. I semi-participated in MSM’s “Make the Most of your Mornings” series, and loved it! I’ve slowly been implementing her ideas and working them into my routine to make them a habit, and I’m pleased to say that I’m seeing some improvement! Just yesterday I started my fall morning routine (a little different now that the kids have started school) and I’m anxious to see how it works. Next week I’m going to share my thoughts on making the most of my mornings, and share my fall routine with you!
Here is a roundup of the things that happened throughout August in the blogging world...
Here are 10 things I want people to remember me for...a list I'm still working on implementing in my life!
My completed a DIY project - iced coffee!
I offered my thoughts on encouragement and ways to encourage others
A new series - a virtual tour of some hot spots in our area of Nova Scotia! Here is an antique shop and here is another gift/antique shop.
My Pinterest project involved some art for my sewing corner.
With my meager sewing abilities I tried to show you how to make a window valence with a lining.
I made some small changes to my bedroom that are the bomb-diggity!
So that was my August! How was yours? Any major life changes or big projects accomplished? Did you get away before school started? Is it still warm where you live? I envy you!
The kids enjoyed soaking up all the sun and ocean they could before cool weather sets in! This girl {loves} swimming in the ocean! Me...not so much!
Mom found Judah a swing. This picture is out of focus, but I think it is cute anyway! He is not all about the swing thing yet...a little insecure-feeling maybe?
His older brother, however...
| Should we tell him???? ;) |
I love, love, love this picture.
Justin waited 15 years to get a brother. Now that he has one, he really does make the most of it. Hes not like a lot of teen boys who won't get near a baby. Justin loves holding him and doing things with him from time to time. Sometimes Justin takes Judah out to sit on the lawn tractor or in the van so he can "drive" the steering wheel. Its a boy thing, I think. :)
An Uncertain Dream by Judith Miller. This is a historical fiction book that I own and have read before, but I was really itching for some easy reading, so I plucked this off my shelf and read it in like 2 sittings. (I actually woke up at 6 am. one morning and couldn’t go back to sleep, so I read half of it right then and there!) It is a decent fiction book, but like I said, it is easy reading. I don’t care to read too many of these types of books, they get boring and cheesy after a while! Let me be clear, also, that this is not a romance novel, either. I really don’t care for those at all! This is just fun historical fiction - my favorite kind of fiction!
At dinner time, we’re continuing to read through the Little House on the Prairie series. We just finished up “The Long Winter” and started “Little Town on the Prairie.” These are two of my favorites! The various details of what it was like for a young person in that era are so interesting. The younger girls are enjoying it immensely...we usually read two or three chapters a day because one is just not enough!
I’ve chatted before how you never know what a month will hold when you set those goals, and this month was no exception. A large Etsy order that I wasn’t anticipating really threw my August for a loop, but I’m thankful for the things I did accomplish. I am thankful for these opportunities that get thrown my way! I’m eager to jump to them!
Here are the goals I set last month:
And here are the ones for September:
During the summer, I kinda slacked off working on one monthly habit like I mentioned here. I have, however, been trying to implement a few new things as I can, so here is a little update on some small habits I’m changing:
-Exercise more. I haven’t updated you on my exercising habits in a while! I am still walking several nights a week at the park. I need to measure for sure, but I think I’m going 2-3 miles each night. I also have started some simple low impact aerobic exercises each morning when I wake up. Just a little something to jump start my day and hopefully help me not gain weight this winter! As I develop a better routine (still experimenting and tweaking to find what works for me!) I’ll be sure to give you a run-down of my method. It is hard to get going each morning, but once I start I’m always glad I did!
-No more coffee after supper. I have tried cutting out an evening coffee to see if it will help me physically and help my sleeping habits. Caffeine does not usually bother my sleeping, but I wondered if maybe it secretly was in a not-as-noticeable way. Sneaky little bugger! So far I haven’t noticed any difference, but I’m still hoping this helps with my waking up habit. Speaking of..
-Better morning routine. I semi-participated in MSM’s “Make the Most of your Mornings” series, and loved it! I’ve slowly been implementing her ideas and working them into my routine to make them a habit, and I’m pleased to say that I’m seeing some improvement! Just yesterday I started my fall morning routine (a little different now that the kids have started school) and I’m anxious to see how it works. Next week I’m going to share my thoughts on making the most of my mornings, and share my fall routine with you!
Here is a roundup of the things that happened throughout August in the blogging world...
Here are 10 things I want people to remember me for...a list I'm still working on implementing in my life!
My completed a DIY project - iced coffee!
I offered my thoughts on encouragement and ways to encourage others
A new series - a virtual tour of some hot spots in our area of Nova Scotia! Here is an antique shop and here is another gift/antique shop.
My Pinterest project involved some art for my sewing corner.
With my meager sewing abilities I tried to show you how to make a window valence with a lining.
I made some small changes to my bedroom that are the bomb-diggity!
So that was my August! How was yours? Any major life changes or big projects accomplished? Did you get away before school started? Is it still warm where you live? I envy you!
Subscribe to:
Posts (Atom)